
Access 2007 -
Creating and Using Forms

Access 2007
Creating and Using Forms

search
menu
/en/access2007/entering-and-editing-data-in-tables/content/
 Another way to populate a database is with the use of forms. An Access 2007 form helps you know exactly what data to enter. In this lesson, we'll address the benefits of using forms with a database, and we'll show you how to set up a basic form for your Access 2007 database, as well as how to use the form to populate or edit data in the database. You'll also learn how to enhance a basic form with a drop-down list.
Download the example to work along with the video.
In real life, a form is piece of paper you fill out so someone can collect and keep track of specific information about you. Only one record—your record—is captured with any given paper form.
 Common Form
Access 2007 forms work in a similar way.
In previous lessons, you saw that you can populate a database by entering records into the tables themselves. If the database has hundreds of records and many fields to populate for any given record, a table can be overwhelming to a user entering data. An Access form lets you enter data one record at a time, without having to see the entire table.
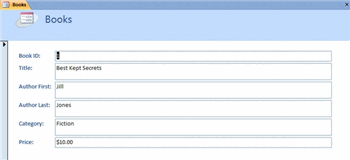 Access Form
An Access 2007 form also lets you know exactly what information to enter and can even tell you what that information should look like. Adding certain control components to a form—like a drop-down menu—can dramatically increase the integrity of the data that is held in a database.
A database owner wants to control the levels of access other database users have to the data; the fewer the amount of people who are interacting with the data, the lower the chances are of the data becoming compromised. Forms are one more way a database owner can limit the actions of other users. Form properties can be set so users can only enter records or just view records.
Access 2007 has several automatic tools for creating forms. These tools are located in the Forms group on the Create tab in the Ribbon, as seen below:
 Forms Command Group
Access 2007 forms tools include:
The basic Form command is the one we suggest because it allows you to see just one record at a time. It also includes all of the fields in your source table for you, and you can modify the layout of the basic form to hide fields or add controls:
The newly created form has the same name as the source table by default. You can give the form a new name by saving the form. You will be prompted to give the form a name.
Populating a database is easy once you have a basic form in place. Record navigation works the same way for forms as it does for tables. The navigation bar is located in the bottom-left of the object pane. The navigation buttons work the same way as they do for tables. The picture below shows the navigation buttons for a form.
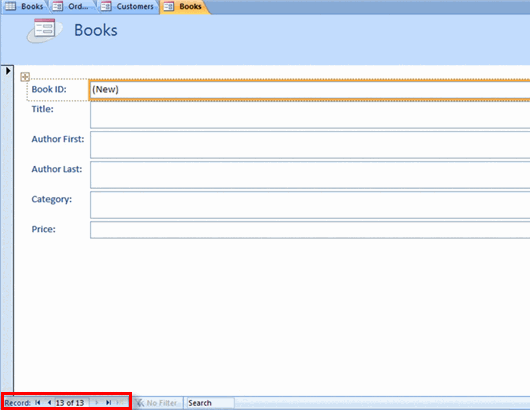 Form Navigation Buttons
Your data must be entered using an acceptable format. The acceptable formats were established when the field properties were set.
Save by using either the Save command on the Ribbon or by progressing to another record using the New (Blank) Record navigation button. Moving to a new record saves the most recently entered record. However, it may be necessary to refresh the table in Datasheet view to see the newest record.
Just like in a table, database users can edit records from a form using the Find and Replace command. This command works exactly the same way in a form as it does in a table.
Using a drop-down list on a form can increase the integrity of the data in the database because drop-down lists force form users to select one of the preset options in the list to populate the field. These types of form controls are relatively easy to set up using the Combo Box.
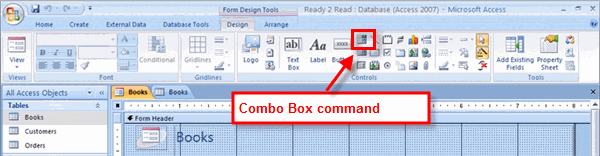 Combo Box Command
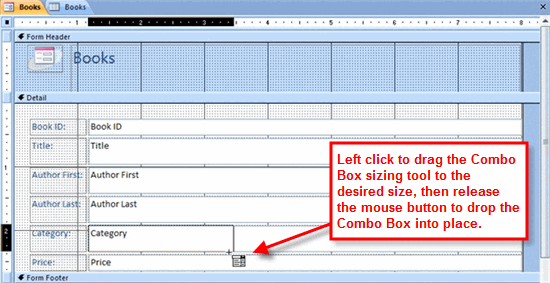 Combo Box Sizing Tool
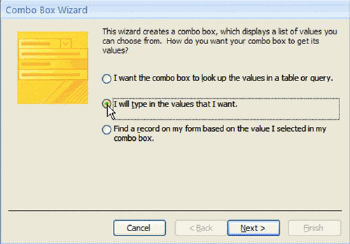 Combo Box Wizard
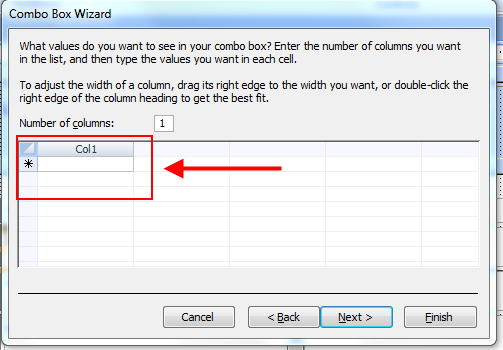 Combo Box Wizard
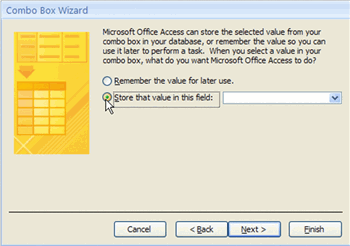 Combo Box Wizard
Whatever name is entered will appear as a label on the form. This label can be deleted if you want.
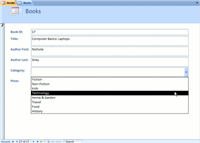
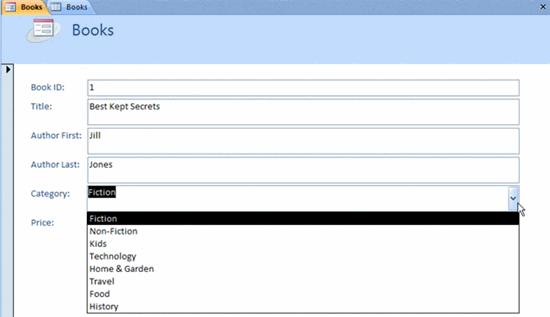
Switch to Form view to see how the combo box works. The Category drop-down list appears on the Books form, as seen in the image below.
 Books Form Drop Down Category List
If you haven't already done so, save the sample Ready2Read database to your computer.
/en/access2007/making-forms-more-usable-with-controls/content/