
Access 2007 -
Making Forms Attractive

Access 2007
Making Forms Attractive

search
menu
/en/access2007/making-forms-more-usable-with-controls/content/
 Now that you know how to make forms work better, it's time to think about what a form looks like. In this lesson, we'll address the various ways to modify a form layout, including how to add a logo and apply an Auto Format to the form. We'll also cover using and formatting titles, as well as moving and applying borders to objects.
Download the example to work along with the video.
Because others will be using the forms in your database to enter data, you may want to make the forms more visually appealing. These types of changes are done to the form in Layout view.
In Layout view, you see the form as it will appear to the user in Form view, so it's useful for setting the size of controls and other objects on the form, as well as for changing the font, colors, and borders on the form.
There are three ways you can open the form in Layout view.
Access 2007 automatically puts a form icon, like the one below, in the header area of every form you create.
One way to customize the look of your forms is to remove the icon and replace it with a logo. This is easy to do using the Logo command.
You can move and resize the logo as well. Moving and resizing objects on a form is covered later in this lesson.
Another simple way to dramatically change the way your form looks is to apply a style with the AutoFormat command. You could modify the color for each part of the form on your own, but Access has already combined colors in several attractive styles. These styles are available under the AutoFormat command.
 AutoFormat Options
One of the easiest things to change on the form is the title, which appears in the form header with the icon or logo.
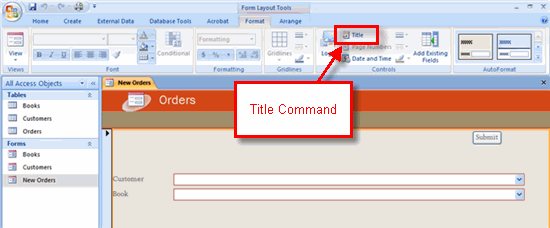 Title Command
Note: The title does not affect the name of the form, and vice versa.
Access, like all Microsoft Office 2007 products, allows you to change the font style, text size, text color, and alignment. It also lets you apply bold, italics, or underline to the text. All of this is done from the Ribbon, as seen in the diagram below.
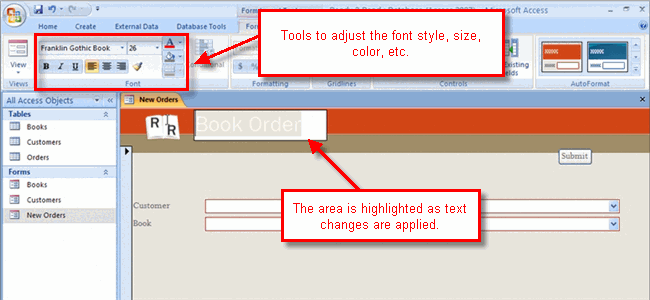 Text Formatting Commands
Additional text formatting options are available in the Font group. The above list includes the most common text modifications.
Other ways to modify the way a form looks in Access 2007 include resizing and repositioning the objects that appear on the form, and applying borders to objects on the form. All of these tasks are easily done in Layout view.
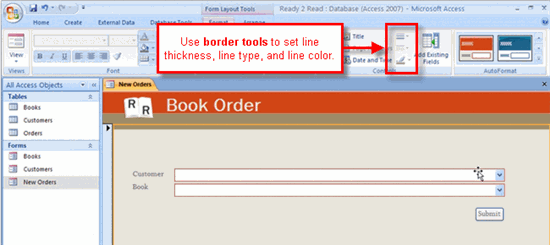 Border Commands
If you haven't already done so, save the sample Ready2Read database to your computer.
/en/access2007/sorting-records/content/