Lesson 8: Working with Multiple Worksheets
/en/excel2003/using-functions/content/
Introduction
By the end of this lesson, you should be able to:
- Name worksheets
- Insert and delete worksheets
- Group and ungroup worksheets
- Copy and move worksheets
Naming worksheets
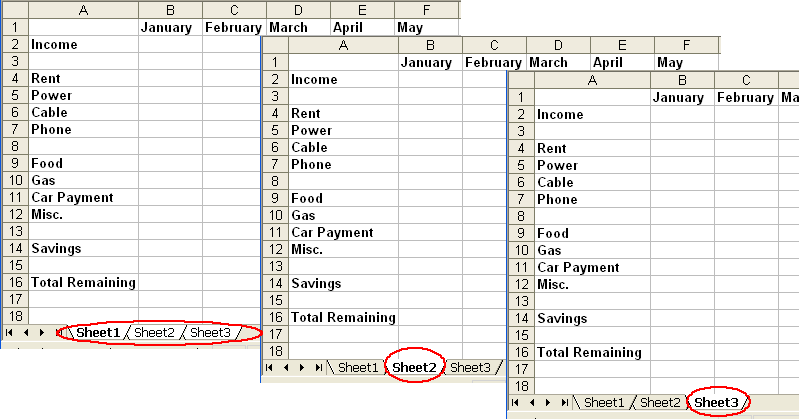
At the beginning of this course, we learned that the tabs displayed at the bottom of the screen are named Sheet1, Sheet2, and Sheet3. These are not very informative names. Excel 2003 allows you to define a meaningful name for each worksheet in a workbook—Checkbook, Reports, Accounts—so you can quickly locate information.
To name a worksheet:
- Double-click the sheet tab to select it. The text is highlighted by a black box.

- Type a new name for the worksheet.

- Press the Enter key.
- The worksheet now assumes the descriptive name defined.
Inserting worksheets
By default, each new workbook in Excel 2003 defaults to three worksheets named Sheet1, Sheet2, and Sheet3. You have the ability to insert new worksheets if needed or delete others you no longer want.
To insert a new worksheet:
- Choose Insert
 Worksheet from the menu bar.
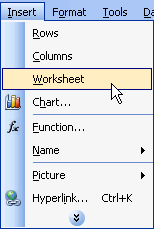
- A new worksheet tab is added to the bottom of the screen. It will be named Sheet4, Sheet5, or whatever the next sequential sheet number may be in the workbook.
Grouping and ungrouping worksheets
A workbook is a multi-page Excel document that contains multiple worksheets. Sometimes you will want to work with the worksheets one at a time as if each is a single unit. Other times, the same information or formatting may need to be added to every worksheet. You can type and retype the same information in each worksheet, apply identical formatting, or group the worksheet and enter the information once.
Worksheets can also be combined together into a group. Grouping worksheets allows you to apply identical formulas and/or formatting across all worksheets in the group. When you group worksheets, any changes made to one worksheet will be changed in any other worksheets in the group as well. If many worksheets are to have the same data—regions, departments, quarters, months, weeks, and days, for example—then you type it once and it will appear on every worksheet included in the grouping.
To group worksheets:
- To select one worksheet, click the sheet tab.
- To select more than one worksheet, hold the Control key down and click on one or more worksheet tabs in the workbook.
- To select all worksheets in a workbook, right-click any worksheet tab and choose Select All Sheets from the shortcut menu.
When you're finished entering, moving, copying, or formatting the data, you will need to ungroup worksheets. If you do not ungroup the sheets, any work you do in one sheet will be duplicated in all others.
To ungroup worksheets:
- Right-click any of the selected worksheet tabs.
- Choose Ungroup Sheets from the shortcut menu.
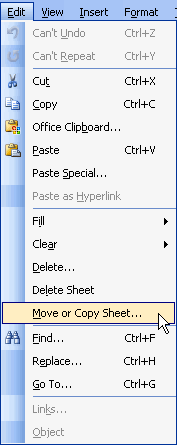
Copying worksheets
When you copy a sheet, you make an exact copy of it.
To copy a worksheet:
- Select the worksheet you want to move or copy.
- Choose Edit Move or Copy from the menu bar.
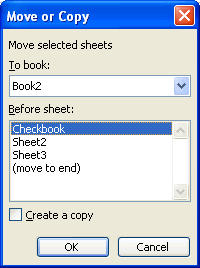
- In the Move or Copy dialog box, use the drop-down boxes to select the name of the workbook you will copy the sheet to (the current workbook is the default). Also define where you want the sheet to be positioned in the workbook.
- Click the Create a copy check box.
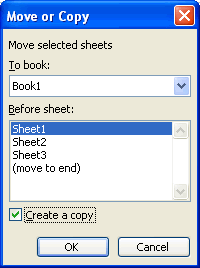
- Click OK to create an exact copy of the worksheet and move it to the location specified.
Challenge!
- Open your Monthly Budget file.
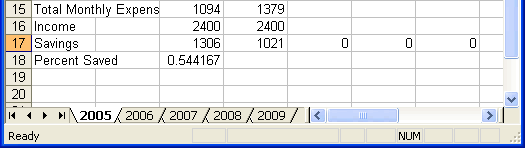
- Rename Sheet1 to 2005, Sheet2 to 2006, and Sheet3 to 2007.
- Insert two worksheets, and name them 2008 and 2009.
- Move the 2008 and 2009 worksheets so they are immediately following the 2007 sheet.
- Use the Grouping feature so the 2006, 2007, 2008, and 2009 sheets contain the same information as column A and row 1 of the 2005 sheet.
- Delete the 2009 sheet.
- Save and close the Monthly Budget document.
/en/excel2003/inserting-and-deleting-rows-and-columns/content/


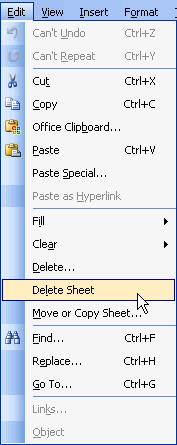
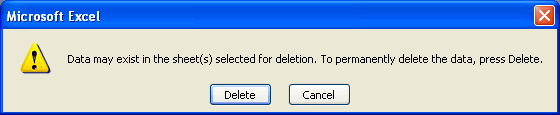
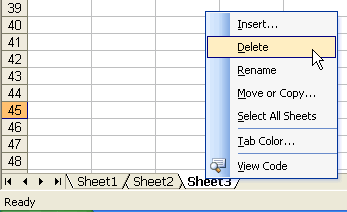
 Another way to delete or insert a worksheet is to right-click on the sheet to be deleted, then select Delete or Insert from the shortcut menu.