
Windows 7 -
Installing Windows 7

Windows 7
Installing Windows 7

search
menu
/en/windows7/upgrading-to-windows-7/content/
You may still be exploring Windows 7, or you may have already purchased the operating system. Either way, we're now going to look at the installation process.
In this lesson, you will review pre-installation preparation and learn how to install Windows 7, along with any accompanying devices and hardware.
There are a few things you need to check before you get started with your installation.
In Lesson 2, we discussed the considerations you needed to be aware of before upgrading to Windows 7. By now, you should have:
In addition, you will need to make sure you have a working Internet connection upon installation, since you may be prompted to download and install security and hardware driver updates.
Microsoft also recommends that you update your antivirus programs. After updating, you should run the antivirus programs and then turn them off. Once the installation is complete, you can turn the programs back on or install new antivirus software that is compatible with Windows 7.
Windows Mail and Outlook Express are not available on Windows 7. If you are currently using these programs, you will need to import your data into Windows Live Mail or another email program after installation.
Before installation, it's a good idea to back up your files, even if you are only doing a simple upgrade. This can be done by copying your files to an external source such as a CD, DVD, external drive, or USB flash drive.
If you are doing a custom (clean) installation, you will need to back up and transfer your files and settings. You will also need to gather your installation discs to reinstall any programs. For programs that were downloaded from the Internet, you may be able to download them again; if not, you'll need to back them up before upgrading.
Microsoft recommends using Windows Easy Transfer to back up and transfer your files and settings. A detailed tutorial on this process will be linked in the next part of this lesson. As previously mentioned, you may want to consider using a computer service professional because performing a custom (clean) installation has the potential to become quite complicated.
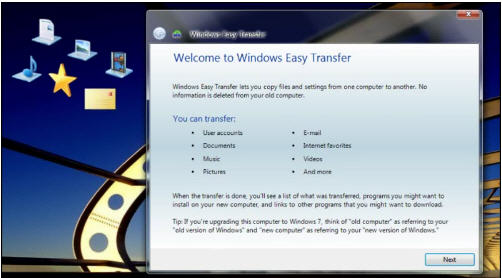 Windows Easy Transfer
Do not use the File and Settings Transfer Wizard in Windows XP because it is not compatible with Windows 7.
An external DVD drive will be needed for disc installation to a Netbook or PC without a DVD drive.
You should now be ready to install the Windows 7 operating system. Due to the variety of installation circumstances, we will direct you to the Microsoft tutorials for detailed instructions.
Once again, you may want to use a computer service professional to perform a custom (clean) installation.
Microsoft's tutorials should have provided specific instructions for installing devices and hardware, but we would still like to point out a few key things you may need to be aware of.
Many of your devices, such as cameras and mobile phones, will be recognized by Windows 7 Device Stage and can be installed by simply plugging them in to your PC. Microsoft created Device Stage to make working with devices easier. Upon plugging in, Device Stage will provide a "homepage" with a menu of tasks, updates, and options for compatible devices and printers.
If you are having trouble installing hardware, go to Microsoft's Update a Driver tutorial for instructions on Windows Update, downloading drivers, and installing printers.
Windows 7 has a new Devices and Printers folder where you can view and access everything that is connected to your computer.
 Devices and Printers folder
If you want to check if the hardware you may be purchasing in the future is compatible with Windows 7, go to the Windows 7 Compatibility Center.
Depending on your circumstances, you may still need to turn on your antivirus software, transfer files, reinstall programs, or import your email data. Otherwise, you should be ready to start using Windows 7.
/en/windows7/getting-started-with-windows-7/content/